
At times, organizations may tailor their office ribbon or quick access ribbon to align with users’ requirements. For instance, they can eliminate the OneNote button if it’s not in use, or remove the Teams button if the company doesn’t utilize Teams. Customizing office tabs enhances the overall appearance and user-friendliness, resulting in a cleaner interface.
Goal: Remove “Share to teams” button in outlook as per company requirement for every user.
1. First, create the desire ribbon layout then export the customization file
2. In this example, I do not want the button [share to teams] that shows up in outlook simplified ribbon. (The simplified ribbon shows just the icons and not text)
Simplified ribbon:

Classic ribbon:

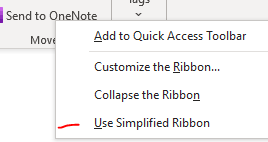
User can move from simplified to classic view by right clicking on any of the icon in the ribbon and select the preferred one.
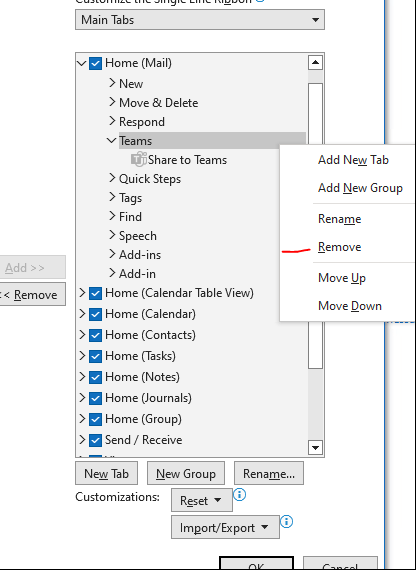
3. I will remove share to teams option by right clicking on an icon and hit Select Customize the ribbon.
4. Select teams and hit remove. Then select “OK” to confirm the changes and exit to confirm the changes. **Important**
6. Once I am done with the layout setup, go back to customize the ribbon > select export the customization. Now we have a customization file with the changes.

7. The exported file name is called “Outlook Customization (olkexplorer.exportedUI)”. The file then needs to be modified.

8. To configure the exported file, open notepad and select the file for edit.
Remove the metadata tag (<mso:cmd>) like <mso:cmd app=”olkexplorer” dt=”1″ slr=”0″ /> from *.exportedUI you exported
Any gibberish that appears before or inbetween “<mso:customUI xmlns:mso=”http://schemas.microsoft.com/office/2009/07/customui” must be removed.
A) In this example, we will delete “<mso:cmd app=”olkexplorer” dt=”1″ slr=”0″ />”

B) In another scenario, delete the metadata listed before “xmlns:mso=”http://schemas.microsoft.com“

Red area : auto generated officeSL file from outlook (correct)
Green area: Generated from “export all customization” option. Remove additional code to match original

**The difference between the *.exportedUI and the *.officeUI files is that a metadata tag (<mso:cmd>) is added to the *.exportedUI file. If an *.exportedUI file is incorrectly identified and is placed in the \AppData\ directory as an *.officeUI file, then the file would fail to parse and not apply any customization.
9. Once the file has been modified, save it as one of the following names:
> OUTLOOK (Click to view)
Classic View (for outlook 2010, 2016, 0365):
olkexplorer.officeUI

Simplified ribbon (for 036):
Olkexplorer.officeSL

Destination file:
%appdata%\microsoft\office\olkexplorer.officeUI or olkexplorer.SL
> EXCEL
Excel.officeUI

Destination file:
%appdata%\microsoft\office\Excel.OfficeUI
> POWERPOINT
PowerPoint.officeUI

Destination file:
%appdata%\microsoft\office\Powerpoint.OfficeUI
> WORD
Word.officeUI

Destination file:
%appdata%\microsoft\office\Powerpoint.OfficeUI
10. In this example, it is renamed to “Olkexplorer.officeSL” since we are configuring simplified view.

11. Once the metadata is removed and file is renamed, the file is ready to be deployed via Group policy preferences
12. The file needs to be copied over to user’s workstation. To proceed, navigate to User configuration > Preferences > windows setting > Files
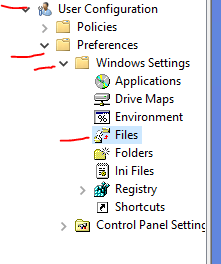
13. Right click and select new file.
The source file path is whichever network share you store the “.officeSL” file in.
In this example, destination file path will be “%appdata%\microsoft\office\olkexplorer.officeSL” since we are working with the simplified ribbon.
> GPP for the Simplified ribbon (Click to view)


> GPP for classic ribbon

Result: Make sure the files are copied to %AppData%\Microsoft\Office\
Before (simplified ribbon):

After (simplified ribbon):

Before (classic ribbon):

After (classic Ribbon):

Troubleshoot and Tips:
**to reset ribbon to default settings:
Delete the officeUI (classic view) or officeSL (single view/modern)from %appdata%/microsoft/office/
**What about quick access toolbar customization?
For example, company requires autosave button to be removed, which is part of the quick access toolbar. The steps are similar to deploying config file for ribbon.

1. Remove what is not needed under quick access toolbar, click “ok” to confirm.
2. Export the customization and remove any metadata that’s in there.
3. In word, the name will be renamed to word.UI.
4. Deploy the copy via Group policy preferences
5. Destination path is %appdata%\microsoft\office.
Source:
http://www.msoutlook.info/question/backup-ribbon-and-qat-customizations
