
This guide will explore the enrollment methods for iOS/iPadOS devices owned by corporations in the context of Intune. This approach involves registering the device using Apple Configurator 2 and Apple Business Manager to achieve a “supervised” status.
The supervised mode in Apple iOS/iPadOS provides administrators with enhanced management capabilities for Apple devices, making it particularly valuable for deploying corporate-owned devices on a large scale. Regular device enrollment does not provide this capability.
Supervised mode provides restrictions in app store, connected devices, cloud storage, airdrop, passwords, locked enrollment, GPS tracking, etc…
Goal: To attain this level of precise control over an Apple device, it must be part of a Device Enrollment Program (DEP). The following section will detail the steps to prepare Intune, Apple Business Manager, and Apple Configurator for the enrollment process. By the end of this guide, all platforms will be ready to prep a device and enroll it into Intune with supervised status.
Prerequisites
Prior to enrolling a supervised corporate Apple device, the following configurations are necessary, assuming that security group and enrollment type profile is already configured.

• An Apple MDM push certificate in Intune.
• Access to Apple Business Manager portal or Apple School Manager portal.
• An active Apple token (.p7m file).
• An active apple enrollment profile created in Intune for apple devices.
• Configure Apple configurator Enrollment profile in Intune
• Set up VPP [optional]
• Configure Apple configurator 2 to enroll new devices into ABM.
An Apple MDM push certificate in Intune
Navigate to Intune Admin center > Devices > Enroll devices > Apple enrollment > Apple MDM push certificate

- Check the agreement
- Select Download your CSR to download and save the request file locally. The file is used to request a trust relationship certificate from the Apple Push Certificates Portal.
- Create an Apple MDM push certificate
- Select Create your MDM push Certificate to go to the Apple Push Certificates Portal.
- Sign in with your company Apple ID or a spare ID.
- Select Create a Certificate.
- Read and agree to the terms and conditions. Then select Accept.
- Select Choose File and then select the CSR file you downloaded in Intune.
- Select Upload.
- On the confirmation page, select Download. The certificate file (.pem) downloads to your device. Save this file for later.
- Enter the Apple ID used for logging into apple MDM push portal
- Upload the .pem generated from Apple MDM push portal into Intune.
- Apple push certificate is now done. This certificate is only valid for 365 days. Once it expires, there is a 30 days grace period.
**The steps are similar when renewing the push certification. First, download the CSR file from Intune and upload it to Apple push certificate portal. Apple will then provide you with certificate file after. Upload this to Intune and that’s all!
Access to Apple Business Manager portal or Apple School Manager portal
1. To obtain an Apple Business Manager account, you need to start by acquiring a DUN (Dun & Bradstreet) number for your organization. Apple mandates that the applying company be a bona fide entity with a DUN number. This nine-digit identifier for businesses is linked to a business’s Live Business Identity, which can be instrumental in assessing potential partners and pursuing new contracts. During the enrollment process, you may also be asked to provide tax information for your company. Getting a DUN number essentially makes your company legit.
- If the company already has one, look it up here: https://www.dnb.com/duns-number/lookup.html
- Apply for a DUN number here: https://www.dnb.com/duns/get-a-duns.html
- When enrolling, try not to miss the call from DUN representative as this may result in your application getting denied. Give them a call back right away to resolve any issues.
2. Once you have the DUN number, apply for apple business manager account here: https://support.apple.com/guide/apple-business-manager/sign-up-axm402206497/web
- ABM will need two login- one for administrator and one for authorized manager. I suggest using a service account and not a regular company email. Call apple to expedite the process if it takes too long.
3. Create user’s managed apple ID with your custom domain. The default admin account will be a randomly generated domain like @na4.appleid.com (DO NOT CHANGE or REMOVE this account). Create a second administrator account with service account as backup.
- **If using azure ad federation service to sync to apple business manager with AD account, Azure AD will be identity provider when signing into apple services using the account from ABM and there must be no other account name in used with the same domain as Azure.
- This means that NO ONE IN THE COMPANY SHOULD SIGN UP FOR APPLE ID USING COMPANY DOMAIN. COMPANY USERS SHOULD NOT SIGN UP FOR ANY APPLE SERVICE USING COMPANY DOMAIN NAME.
- If there is an existing apple ID account attached the company domain, admin will get this email:

Get an Apple automated device enrollment token (.p7m file) [ABM > Intune]
This token lets Intune sync information about ADE devices that your organization owns. It also allows Intune to upload enrollment profiles to Apple and to assign devices to those profiles.
In order to Get automated device enrollment token (.p7m file) from apple, which sync Intune device info to ABM
- Under Intune Admin portal, navigate to Devices > iOS/iPadOS > iOS/iPadOS enrollment > Enrollment Program Tokens > Add
- Select Download the Intune public key certificate required to create the token and then upload the .pem file to ABM
**The ADE sync token stored in Intune is not valid to Apple’s service- error** (in this case, if error shows up- renew the token)

The file will show up as with a .pem extension.

3. Go to ABM (Apple Business Manager)- Apple Business Manager
Download the Apple token (In order to download the apple token, the .pem file must be uploaded first)
In this portal, complete the following steps.
- In ABM, select the company below > preferences > under “Your MDM server” > Click add under MDM server assignment
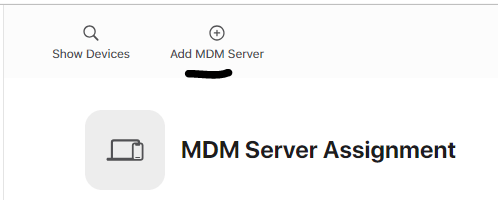
- In settings, all tokens are shown. Add an MDM server, and upload the public key certificate (.pem file) that you downloaded from Intune then click save.

- Use the server name to identify the mobile device management (MDM) server. It isn’t the name or URL of the Microsoft Intune service.
- After the MDM server has been created, select it, and then download the token (.p7m file). You’ll upload this .p7m token in Intune.

This will be the apple token that will need to be uploaded to Intune.

4. Navigate back to Intune portal and upload your .p7m token.


**With the push certificate, Intune can enroll and manage iOS/iPadOS devices by pushing policies to enrolled mobile devices. Intune automatically synchronizes with Apple to access your enrollment program account.
Now that Intune has permission to manage your devices, you can synchronize Intune with ABM to see your managed devices from the Intune portal.
In order for the device to show up in ABM, it must be enrolled using apple configurator.
Create an Apple enrollment profile
Deploy enrollment profile for apple devices enrolling into Intune. This step will enable the supervised mode and dictates how users authenticate using the device for the first time.
Navigate to Intune portal > Device > iOS/iPadOS > iOS/iPadOS enrollment > Enrollment Program Tokens > Click on token name > Under Manage > profiles > Create profile
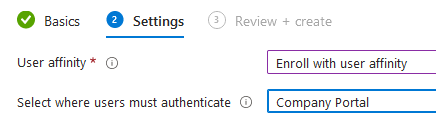
User Affinity & Authentication Method:
User Affinity:

Enroll with User Affinity -  Choose this option for devices owned by users who wish to utilize the Company Portal for services such as app installations.
Enroll without User Affinity - Select this option for devices that aren't affiliated with a single user. Use this option for devices that don't access local user data. This option is typically used for kiosk, point of sale (POS), or shared-utility devices.
Enroll with Azure AD shared mode- Select this option to enroll devices that will be in shared mode. Shared device is a single device with multiple user authenticating into it.
Authentication Method:
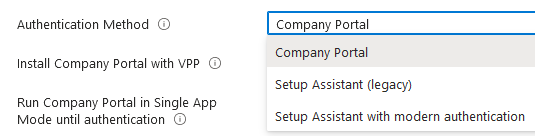
Company Portal- the portal will install as soon as user finishes the enrollment in order to authenticate. The user MUST log into the portal to access resources. Great use the following is being utilized:

• Works with VPP (volume purchase program) enabling the company portal to install without user Apple IDs.
• Use multi-factor authentication (MFA).
• Register devices in Azure AD and use features available with Azure AD, such as conditional access.
• Allow password change
• You want to lock the device until the Company Portal app installs.

Setup assistant with Modern Authentication- For devices running iOS/iPadOS 13.0 and later, users must log in and authenticate during out-of-box experience (OOBE) enrollment with Setup Assistant phase, prior to users accessing the home screen. Users are required to authenticate with their Azure AD credentials twice: once during enrollment with Setup Assistant, and then again when they sign in to the Company Portal

• Works with VPP (volume purchase program) enabling the company portal to install without user Apple IDs.
• Use multi-factor authentication (MFA)
• Register devices in Azure AD and use features available with Azure AD, such as conditional access.
• Allow password change
• MFA will not work if you're using a 3rd party MFA provider to present the MFA screen during enrollment. Only the Azure AD MFA screen works during enrollment.

Setup Assistant (legacy) - for older apple devices, does not support MFA or registers device to Azure AD.

** When enrolling an iOS/iPadOS device with Setup Assistant with Modern Authentication, app configuration policies are automatically applied to the iOS/iPadOS device. Don’t send a separate app configuration policy to the Company Portal for those iOS/iPadOS devices or it will result in an error.
Install Company Portal with VPP – Select your token (In this lab, we will utilize VPP to deploy apps without user interaction)
Run Company Portal in Single App Mode until authentication – Select No
Management Options:
Locked enrollment- The purpose of locked enrollment is to PREVENT users removing the management profile manually.
However, this works a little differently for devices not originally purchased through Apple Business Manager but later added to be a part of automated device enrollment.
The users with a supervised corporate device will see the remote management button in the Settings app for the first 30 days after activating their device, meaning they can manually remove the profile within 30 days. It is only after 30 days, that it gets locked and changes cannot be made.

Sync with computers- If deny all is selected, the port will be limited to only charging. It will be blocked from using iTunes or Apple Configurator 2. This is a prefer option to completely lock down the device from any data transfer.
The settings configured below will meet our needs for Supervised devices:

Setup Assistant: Input department name and contact and toggle what to appear in iphone setup assistant for users.
Verify the enrollment profile created. Next, we will on prepping Apple Configurator.

Configure Apple configurator Enrollment profile in Intune [AC > Intune]
Configure Enrollment profile for Apple Configurator so it can enroll the device into Intune.
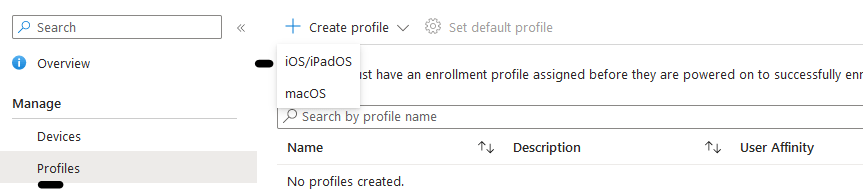
1. From Intune Admin portal , Create a profile under Device Enrollment > Apple Enrollment > Apple Configurator

2. Profiles > create >
Enroll with User affinity and authenticate with company portal.
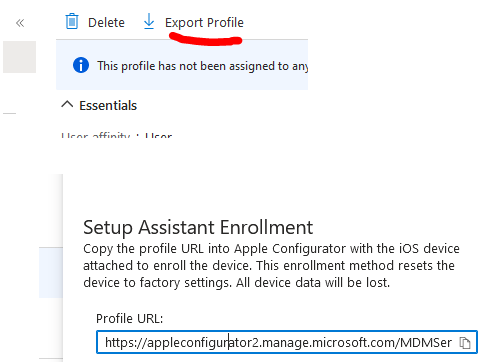
3. After the profile is created, select it and click export profile. You will need the profile URL later in the guide in order to add the MDM server into Apple configurator 2.
Set up VPP [Highly Recommend]
With Apple Business Manager you can purchase multiple licenses for an app if Volume Purchase Program is configured. VPP enables company to deploy apps purchased in ABM to be deployed to enrolled devices. User will not have to sign in with managed apple ID in order to download apps. The apps will get automatically installed. Note that managed apple ID cannot install any apps from app store, so it is recommended to configure VPP for granular control of deployment and a better user experience.
To configure VPP so company portal can be deployed right away:
- Login on the Apple Business Manager portal and go to company name on the bottom > preferences > Payment and Billing > Content Token > Download VPP Token (.VPPTOKEN) extension.
- From Intune, go to Tenant administration > Connectors and tokens > Apple VPP Tokens. Click “Create” to create a new Apple VPP token in Intune.
- Enter a name for the token, the used Apple ID and select the downloaded “VPP token”. Press “Next” to continue.
- Configure the following settings and click “Next”.

5. Configure scope tag (optional), then proceed to click “Create” to finish setup.
6. Once the configuration is complete, you’ll gain the ability to utilize VPP content within Intune and allocate it to users. However, in order to make use of applications and books obtained through Apple Business Manager, you must first synchronize Apple Business Manager with Intune. By default, this synchronization process occurs automatically twice daily, but you also have the option to manually trigger a sync. To initiate a manual sync, navigate to ‘Tenant Administration’ -> ‘Connectors and Tokens’ -> ‘Apple VPP Tokens,’ select the three dots at the end, and click on ‘Sync.’

7. Once the token connector is configured on Intune, go back to ABM and purchase Company portal apps from Apps and Books. The price is free so purchase as many as you can!

8. Once the app are purchased, the applications which are synced from the Apple Business Manager have the type “iOS volume purchase program app”. Now these apps can be assigned to corporate devices.

9. Select Intune Company portal app and assign it to iOS_COBO_assigned group. User will authenticate with company portal app deployed by VPP during setup.
- Remember to assign app license as Device (user licensing will won’t work as you use manager Apple IDs)
- Deploy it via device license instead of user license to avoid pop up of asking to sign into app store in order to download app.

• BYOD Device - User License - License is assigned to user, you get app from company portal but it pulls it from the app store so it needs a user license (managed/unmanaged Apple ID) to initiate install.
• COBO Device- Device license - License is assigned to device, you get app from VPP without initiating install with apple ID. This is a user-less install.

Configure Apple configurator 2 to enroll new devices into ABM.
Use apple configurator 2 in order to enroll apple devices into apple business manager. To use Apple Configurator version 2.16, you must have a Mac with macOS 12.4 or later.
To enroll, I would use a Macbook with Apple configurator 2 installed. Once the setup is done, connect the phone via cable to Macbook to enroll.
Open Apple configurator 2:
1. Create Organization– Apple configurator > Settings > Organizations


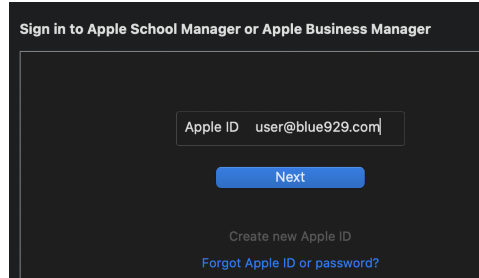
Select “+” > Create an organization >


Enter ABM and password
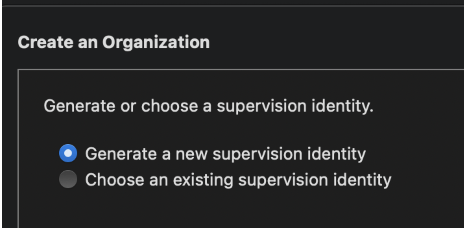
Select Generate a new supervision identity and done! A new organization has been added.
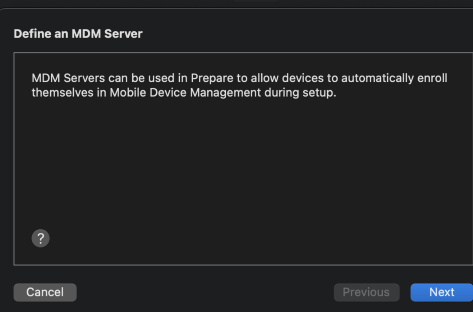
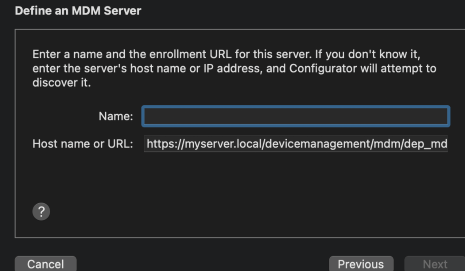
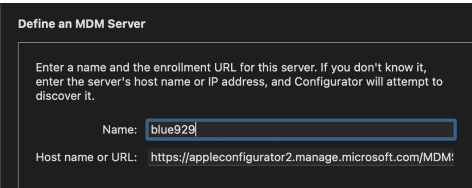
2. Add MDM servers: Click Servers > “+” > Define an MDM server (Add a name and hostname/url)

In order get MDM server url:

• Create a profile under Device Enrollment > Apple Enrollment > Apple Configurator in Intune
• Open the profile created above, and click on 'Export Profile'
• Use the URL generated to add an MDM server in Apple Configurator. The URL should start with [https://appleconfigurator2.manage.microsoft.com/]
3. Create profile
A profile must be assigned to device enrolling into Apple configurator. We will only configure Wi-Fi as bare minimum. To create a new profile:
Navigate to File > New profile > select Wi-Fi > fill out the settings > file > save it to local folder.

**ONLY NEED WIFI CONFIG- Profile restrictions DOES NOT carry over if managing from a different MDM
We are now done with the prerequisite that is needed to enroll a corporate device under the supervised state! The next stage is do plug the device into apple configurator and start the enrollment.
Source:
https://learn.microsoft.com/en-us/mem/intune/enrollment/device-enrollment-program-enroll-ios
https://learn.microsoft.com/en-us/mem/intune/enrollment/apple-mdm-push-certificate-get
https://learn.microsoft.com/en-us/mem/intune/enrollment/device-enrollment-program-enroll-ios
https://learn.microsoft.com/en-us/mem/intune/enrollment/automated-device-enrollment-authentication
” target=”_blank” rel=”noreferrer noopener”>https://techcommunity.microsoft.com/t5/intune-customer-success/setup-assistant-with-modern-authentication-for-ade-intune-public/ba-p/2279061>
https://vmlabblog.com/2020/08/setup-apple-business-manager-with-intune/
https://learn.microsoft.com/en-us/mem/intune/remote-actions/device-supervised-mode
https://learn.microsoft.com/en-us/mem/intune/enrollment/apple-configurator-enroll-ios
https://azurecloudai.blog/2021/01/28/set-up-ios-ipados-device-enrollment-with-apple-configurator/

One thought on “iOS/iPadOS-COBO-Device Enrollment [Part 1] Prerequisites (Supervised Mode)”