
In a nutshell, Xerox® CentreWare® Web (CWW) is a free, web-based platform that lets you manage and control your print devices from a single, powerful interface. Think of it as the command center for your printers and multifunction devices (MFDs), whether they’re from Xerox or other brands as long as they’re SNMP-compliant.
Here’s what you can do with CWW:
- Manage installations: Add new devices, configure settings, and update firmware easily.
- Centralized control: Configure and view settings for all protocols (IP, IPX, etc.) from one place, simplifying device integration.
- Configuration sets: Create templates for network protocols, scanning, job accounting, and security settings to apply across multiple devices.
- Monitoring and reporting: Track device usage, generate reports, and identify potential issues before they disrupt workflow.
- Maintenance tasks: Perform routine maintenance like meter readings and toner cartridge replacements remotely.
- Security features: Set user permissions, control document access, and encrypt sensitive data to keep your printing environment secure.
System Requirements (..)
The following are the minimum system requirements for installation:
(Based upon specific system configuration and needs, additional hardware may be required.)
Operating System:
- Windows 10
- Windows 10 x64
- Windows 10 IOT
- Windows 11 Professional
- Windows 11 Enterprise
- Windows Server 2012
- Windows Server 2012 R2
- Windows Server 2016
- Windows Server 2019
- Windows Server 2022
Database Server:
- SQL Server Express 2014 SP2
- SQL Server Express 2016 SP1
- SQL Server Express 2017
- SQL Server Express 2019
- SQL Server 2014 SP2
- SQL Server 2016 SP1
- SQL Server 2017
- SQL Server 2019
- SQL server 2022 is NOT support – as it only supports sector storage sizes of 512 bytes and 4 KB. Sector disk check error- https://learn.microsoft.com/en-us/troubleshoot/sql/database-engine/database-file-operations/troubleshoot-os-4kb-disk-sector-size?WT.mc_id=DP-MVP-5440
CWW no longer ships with SQL Server Express because of its large download size. Download SQL express from microsoft site.
CWW requires the 4.8 version of the Microsoft .NET framework to be installed before the application is installed.
On windows 10 or Windows server, install and turn on the following services/features:
1. Install iis rewrite module: https://www.iis.net/downloads/microsoft/url-rewrite and .NET framework
2. Navigate to [Turn on Windows features on or off] and enable the following features:
On Windows server (Roles and Features)


On Windows 10/11 device (Features):
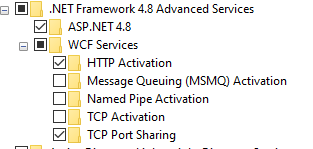
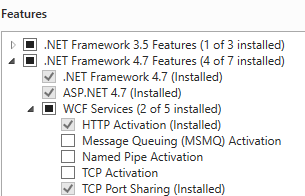
Features > .Net Framework 4.8 Advanced Services: 
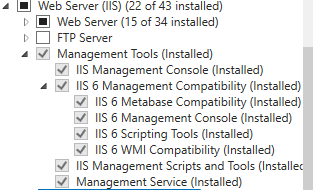
Internet Information Services > Web Management Tools: 
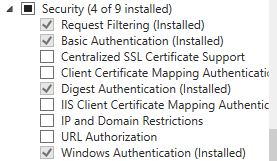
Under Internet Information Services > world wide web services > 
Under Internet Information Services > world wide web services > 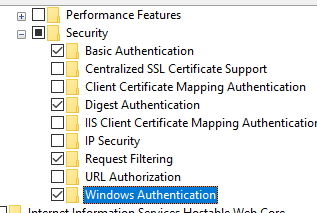
Under Internet Information Services > world wide web services > 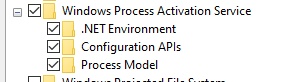
Windows Process Activation Service:
**Verify IIS is working by going to http://localhost on a browser after all the steps are completed. The IIS page should come up.

3. Once the IIS features are turned on, establish a local database by using Microsoft SQL server.
Microsoft SQL server installation
A) Head to https://www.microsoft.com/en-us/sql-server/sql-server-downloads and install SQL server Express 2019 edition.
B) Go with Basic installation
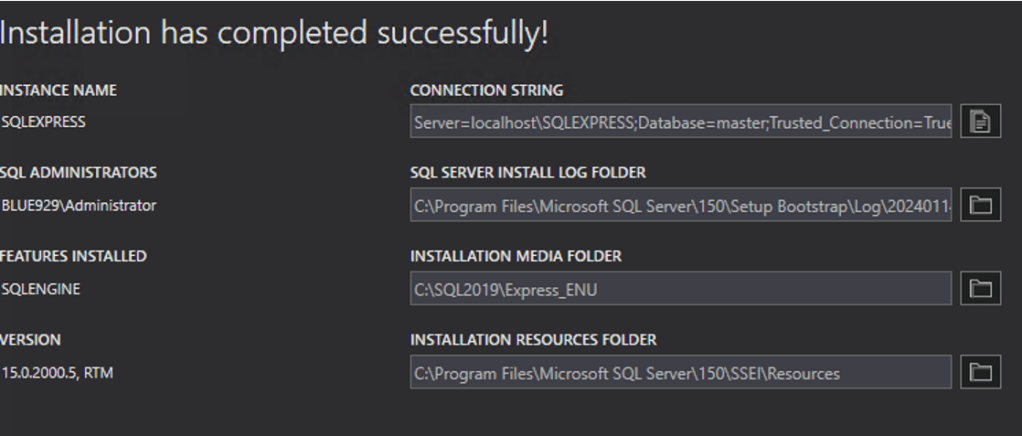
Database=master
SQL admin: Blue929\administrator
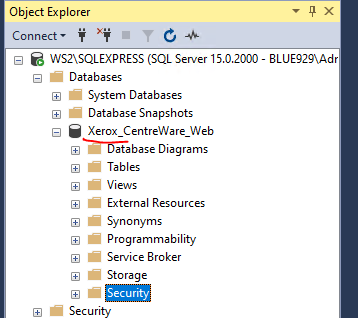
C) Install SQL Server Management Studio (SSMS) afterwards to manage database (Optional)
D) Open SSMS, the SQL server is installed on Windows 10 OS host named WS2

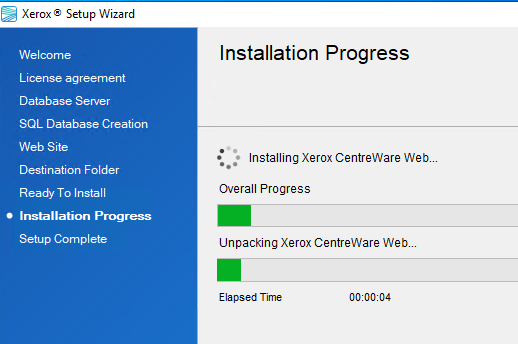
4. Once IIS features and SQL database are established, install and run Xerox CentreWare Web Wizard. Download can be found here: https://www.support.xerox.com/en-us/product/xerox-centreware-web/downloads?platform=all&language=en


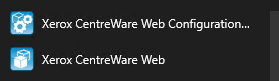
Post setup wizard- there will be two shortcuts created:
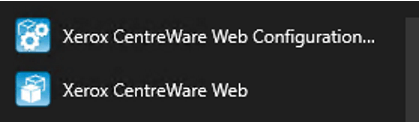
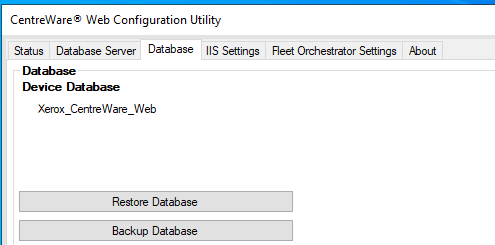
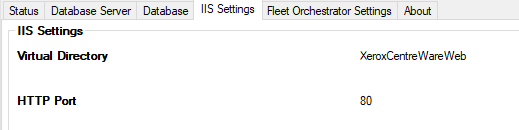
Xerox CentreWare Web configuration provides details on iis and database settings:

Xerox CentreWare Web provides the platform to manage printers via a GUI (It shortcuts to Localhost):


The Installation is now done!
You can continue to customize CWW for your needs, however I suggest following the best practices first before first time configuration.
Recommended best security practices for CWW:
1. In IIS, modify the port number for the Centreware Web server to something other than port 80. Port 80 is the default, and even simple viruses exploit that. Modify this via Properties on the default web site in the IIS snap-in.
After changing this, the URL to connect remotely to Xerox Device Manager is
http://<ServerName><port number>/XeroxCentrewareweb
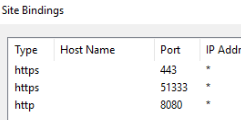
Modify the port number under sites > edit sites > bindings. After that, access the webpage with http://xeroxcww:8080/XeroxCentrewareweb 
Powershell > Test-NetConnection -ComputerName “xeroxcww”-port 8080 -InformationLevel “Detailed” 
Port 80 failed 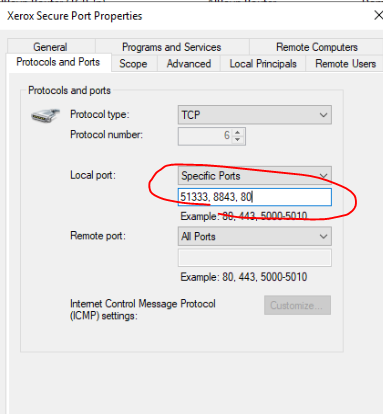
-Modify firewall inbound setting to allow 8080 after and change the xerox shortcut to point to 8080 under C:\Program Files (x86)\Xerox\Xerox CentreWare Web\xrxsite.url (create new shortcut and replace)
2. In IIS, restrict access to the web site to specific IP Addresses. Modify this via the Properties on the default web site in the IIS snap-in.

In IIS Manager, expand SERVERNAME > Sites > click on a required website > double-click IP Address and Domain Restrictions (under IIS group > Click Add Allow Entry... (on the right pane) to add an IP address or IP address range which will be allowed to access the website. Click OK. (*IP and Domain restriction feature must be enabled under IIS Web server on Server manager- To deny all IP, input 0.0.0.0/0 under deny rule)

3. Enable ONLY Windows Authentication- You can configure IIS to send the user name and password in clear text. With basic authentication, the username and password are encoded, but are relatively easy to decode. When basic authentication is turned off, browsers must connect to these secure areas via Windows® authentication, which never passes the password on the network.
In IIS Manager, expand SERVERNAME > Sites > click on a required website > Authentication > Windows Authentication > Enable. (This will require user to sign into site AD credentials if its a windows environment)

- Windows authentication authenticates the user by validating the credentials against the user account in a Windows domain
- Basic authentication verifies the credentials that are provided in a form against the user account that is stored in a database – **may be necessary if using local account to authenticate if server is in workgroup.
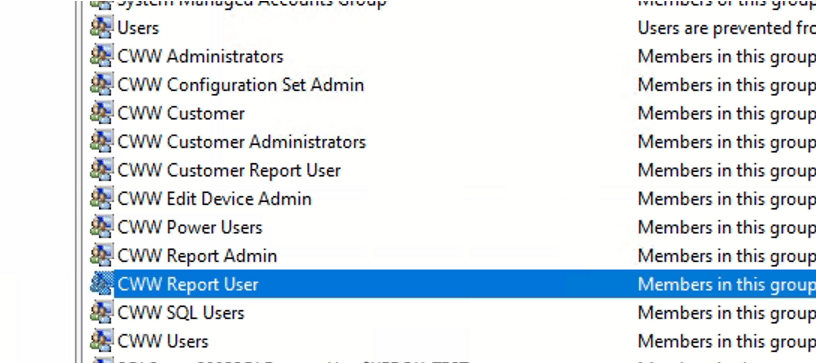
4. Apply group based permission - Centreware Web specific groups access restriction is dependent on the groups to which the user is assigned. Centreware Web creates CWW user groups during the install that grant members specific rights to the application. For this project, create a second admin login (BreakGlass account) and place user under CWW administrator group. If users are NOT part of CWW Administrators, access to CentreWare web portal will be DENIED.
Apply user to group where its appropriate.
5. IIS site permission restriction -
Go to site > edit permission > disable inheritance > remove users group. Only allow local administrators access and IIS_Users group access.
6. If you are ONLY using CWW on your IIS server, it's recommended to disable the IIS default page due to a known security vulnerability.
https://port135.com/vulnerability-remove-the-default-page-or-stop-disable-the-iis-server/

Source:
https://www.xerox.com/en-us/office/software-solutions/xerox-centreware-web
https://www.support.xerox.com/en-us/product/xerox-centreware-web/downloads?platform=all&language=en
